Laporan Praktikum
17 Mei 2025 ~ Oleh Surya Andika
Konsep OOP
- Class − a template for making many instances of the same kind (or class) of object.
- Object − individual instance of the data structure defined by a class.
- Member Variable − These are the variables defined inside a class. This data will be invisible to the outside of the class and can be accessed via member functions. These variables are called attribute of the object once an object is created. object data. variables of a parent class. or super class.
- Member function − These are the function defined inside a class and are used to access.
- Inheritance − When a class is defined by inheriting existing function of a parent class then it is called inheritance. Here child class will inherit all or few member functions and.
- Parent class − A class that is inherited from by another class. This is also called a base class.
- Child Class − A class that inherits from another class. This is also called a subclass or derived class.
- Polymorphism − Same function can be used for different purposes.
- Overloading − a type of polymorphism in which some or all of operators have different implementations depending on the types of their arguments. Similarly functions can also be overloaded with different implementation.
- Data Abstraction − Any representation of data in which the implementation details are hidden (abstracted).
- Encapsulation − refers to a concept where we encapsulate all the data and member functions together to form an object.
- Constructor − refers to a special type of function which will be called automatically whenever there is an object formation from a class.
- Destructor − refers to a special type of function which will be called automatically whenever an object is deleted or goes out of scope.
Langkah-langkah Membuat CRUD Sederhana OOP PHP dan MySQL
1. Tujuan
Agar mahasiswa mampu mengimplementasikan konsep OOP pada PHP dengan membuat suatu aplikasi CRUD sederhana.
2. Alat yang digunakan
- XAMPP (SQL)
- Visual Studio Code (code editor)
- Git (jika perlu)
3. Langkah-langkah
A. Persiapan
- Pertama buat folder baru
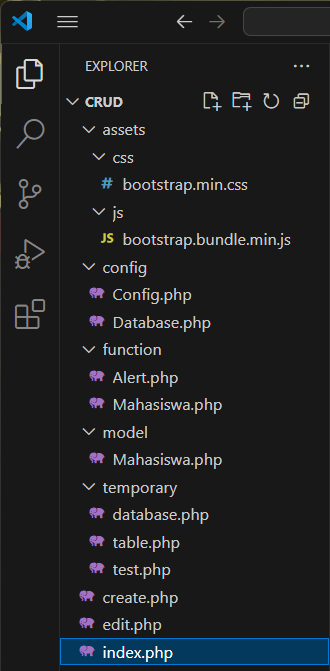
cruddi dalam folder htdocs yang ada pada folder XAMPP - Kemudian buat beberapa file dan folder seperti berikut di dalam folder crud sebelumnya.
- Download dan simpan file css dan js
Bootstrapkemudian masukkan hasil download css dan js ke dalam folderassets.
B. Koneksi ke Database
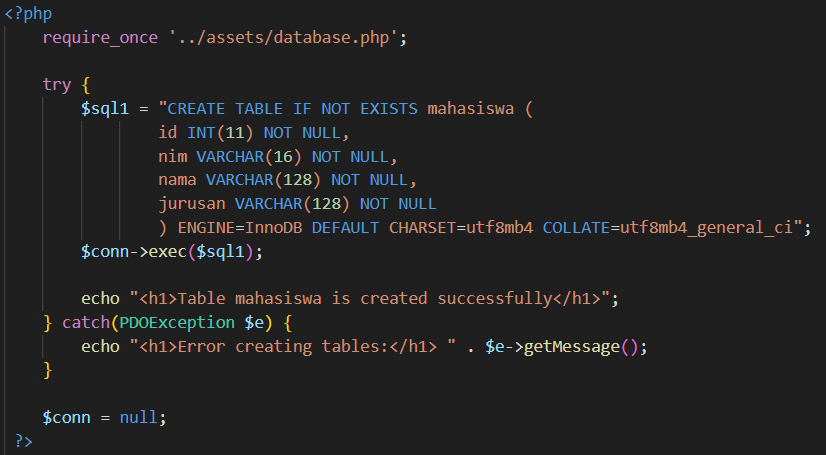
- Buat database
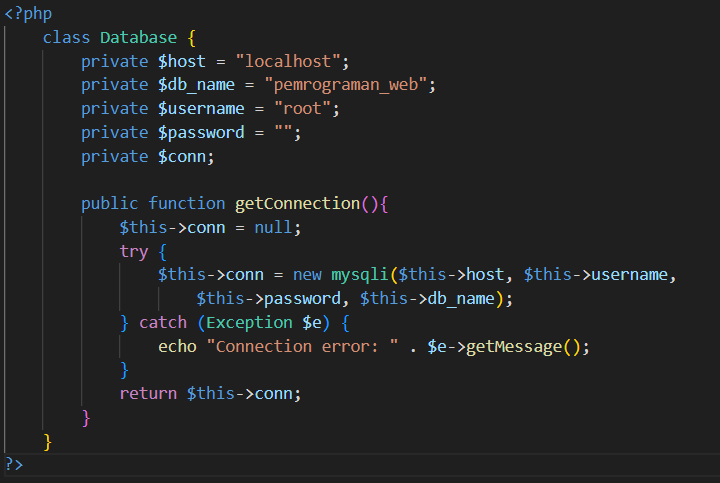
pemrograman_webdengan menggunakan kode SQL kemudian buat juga tabelmahasiswa. - Buka file
Database.phppada folder config lalu buat kode berikut untuk membuat koneksi ke database

C. File Config
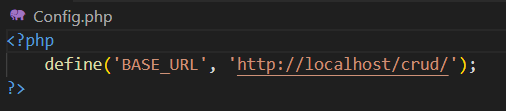
- Buka file
Config.phppada folder config lalu tambahkan kode variabelBASE_URLini agar nanti bisa diakses dari kelas manapun.
D. Alert
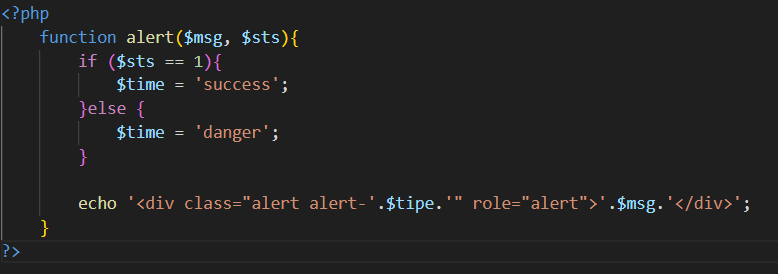
- Buka file
Alert.phppada folder function lalu buat kode berikut untuk menampilkan pesan berhasil/gagalnya aktifitas yang dijalankan.
E. Class Model Mahasiswa
- Buka file
mahasiswa.phppada folder model lalu tambahkan fungsisession_start()dan jugaclass Mahasiswayang berisi deklarasi variabel-variabel yang nanti akan dibutuhkan. - Tambahkan fungsi
constructorserta operasi Create, Read, Update dan Delete di dalamnya.

F. Class Function Mahasiswa
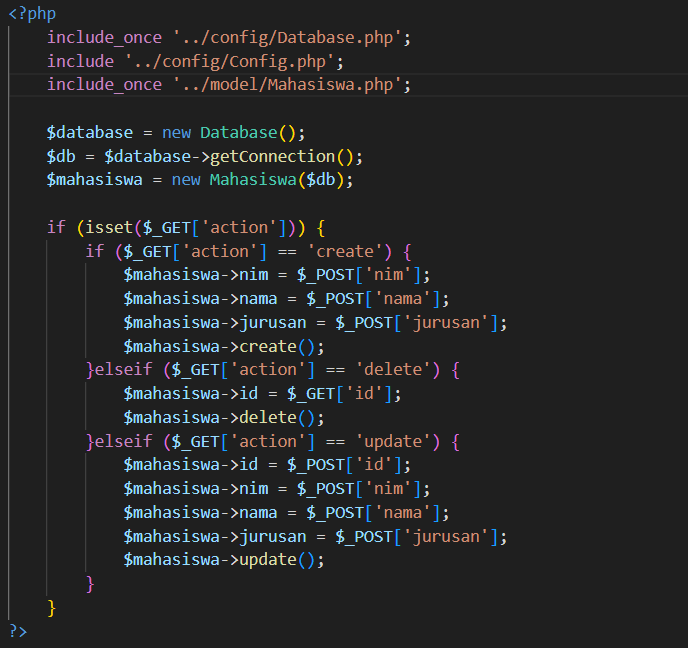
- Buat file
mahasiswa.phppada folder function lalu buat kode ini. - Panggil file Database.php, Config.php, dan model/mahasiswa.php dengan menggunakan fungsi
includeatauinclude_once - Kemudian buat objek
new Databasedannew mahasiswayang akan disambungkan koneksinya. - Tambahkan kode program
$_GET['action']ini pada kode sebelumnya.
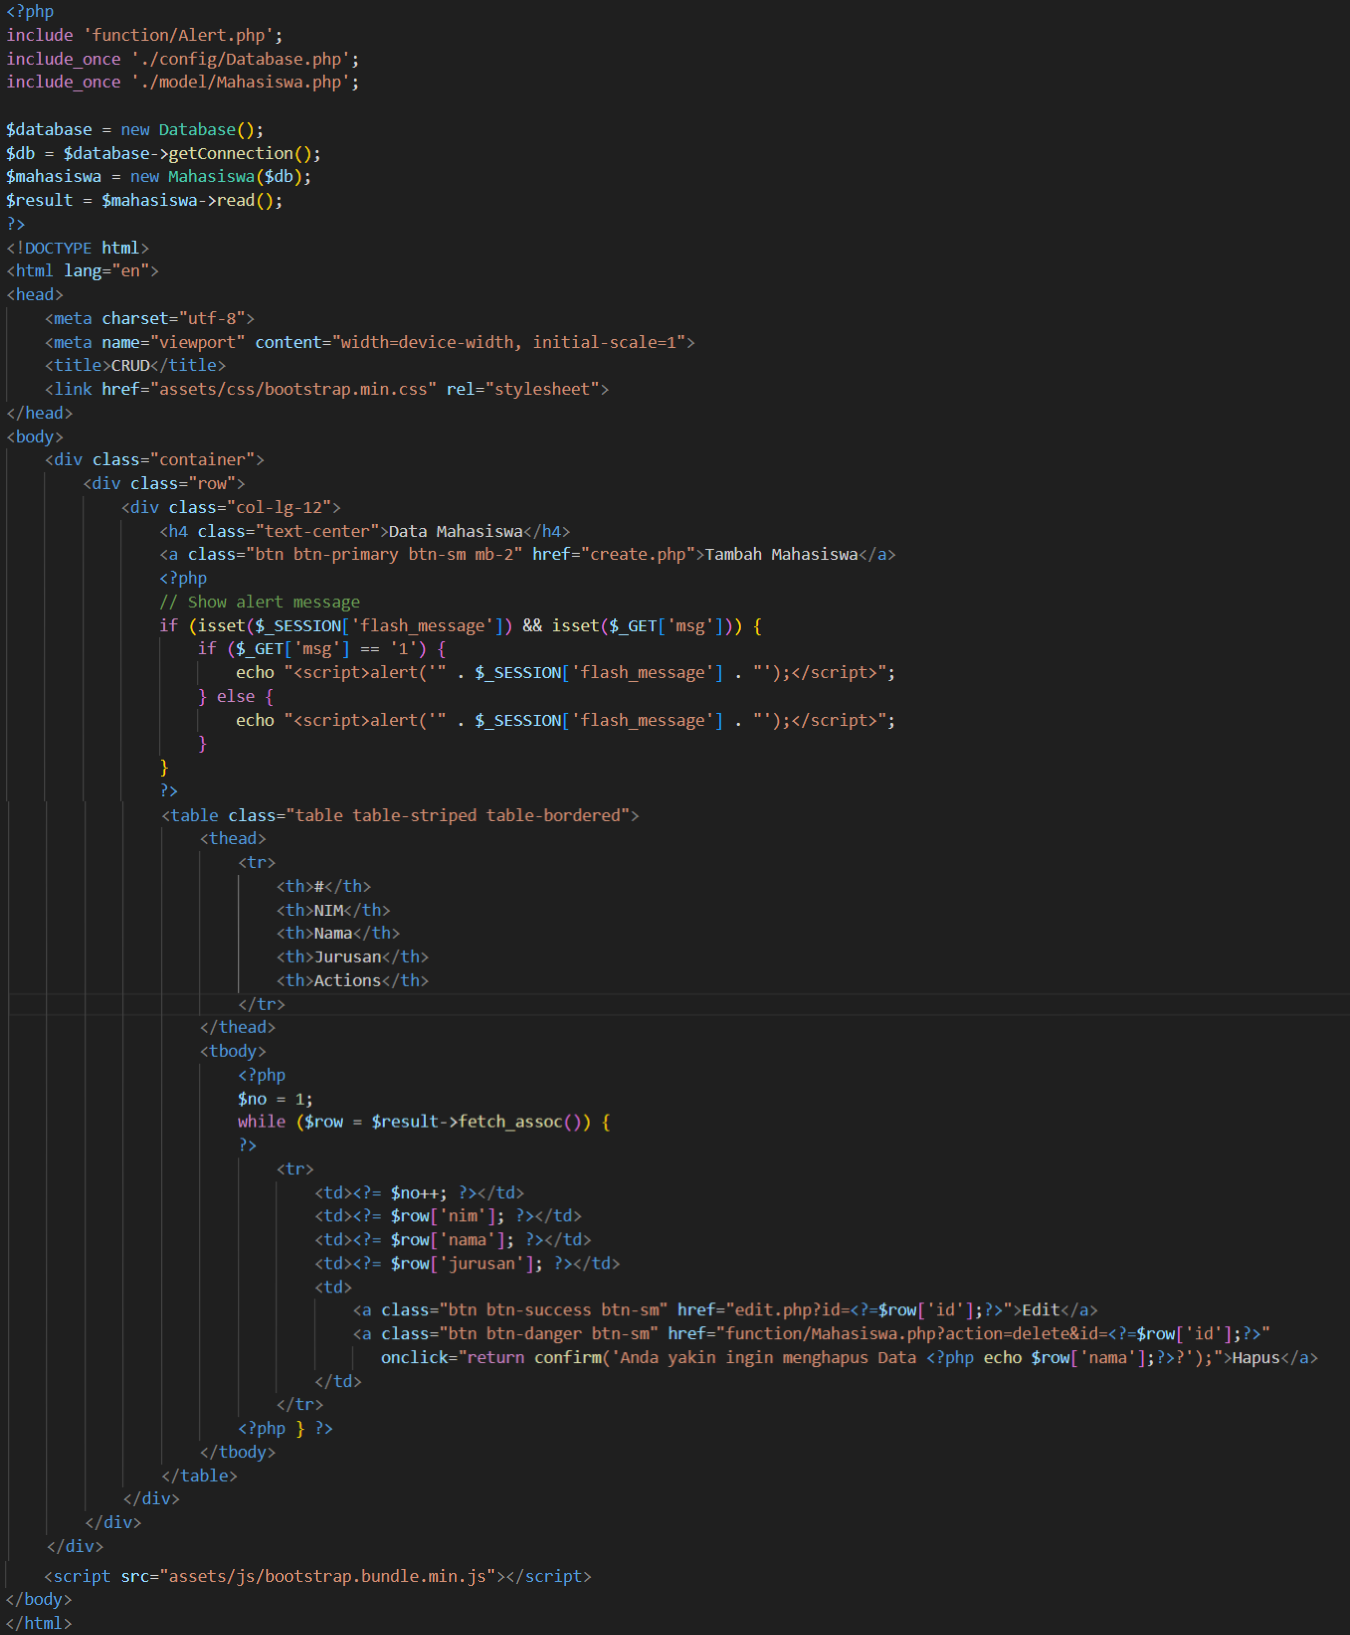
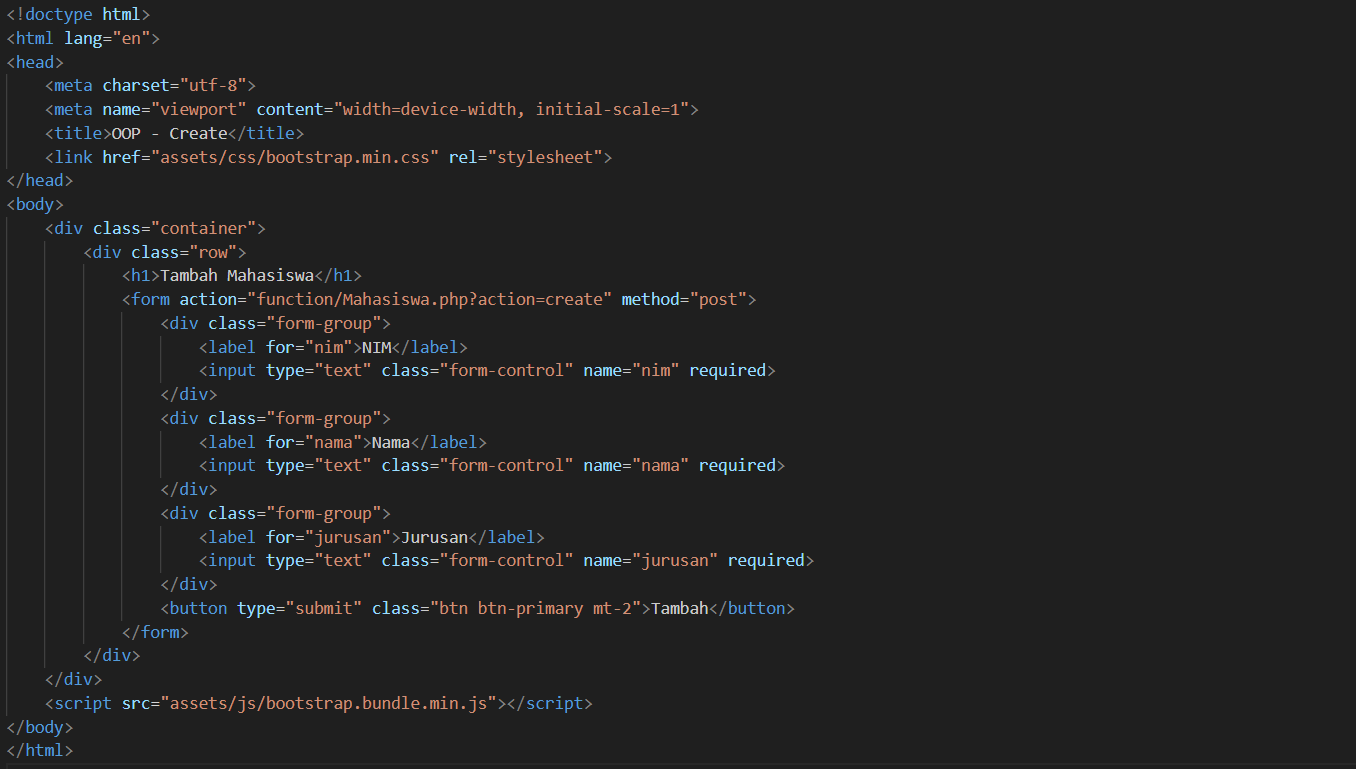
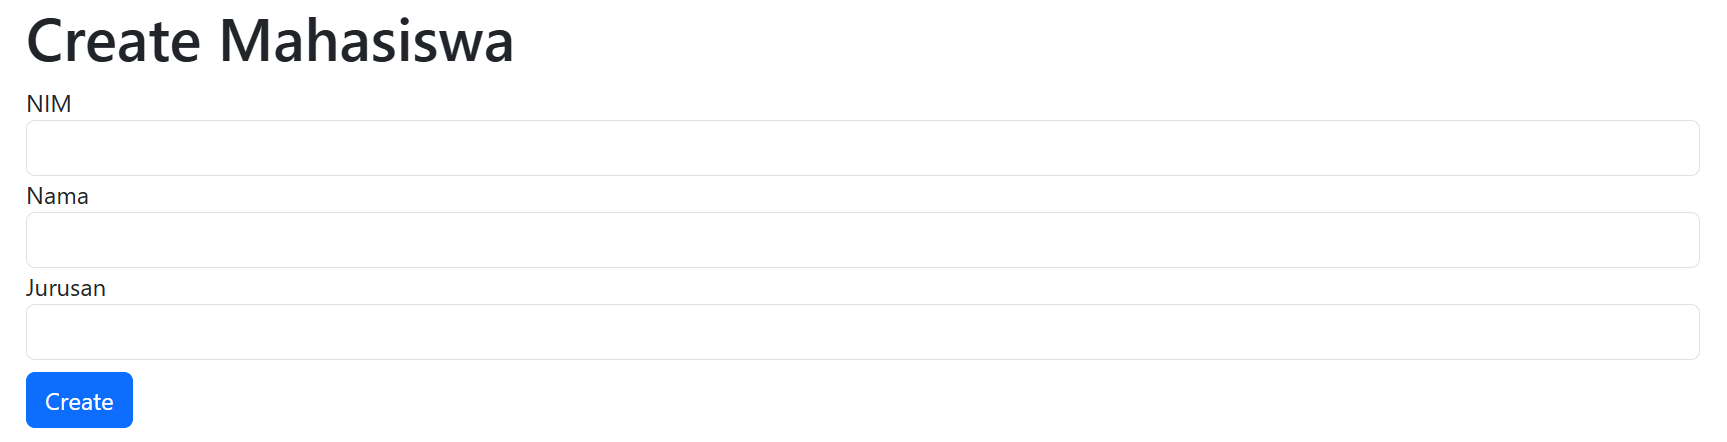
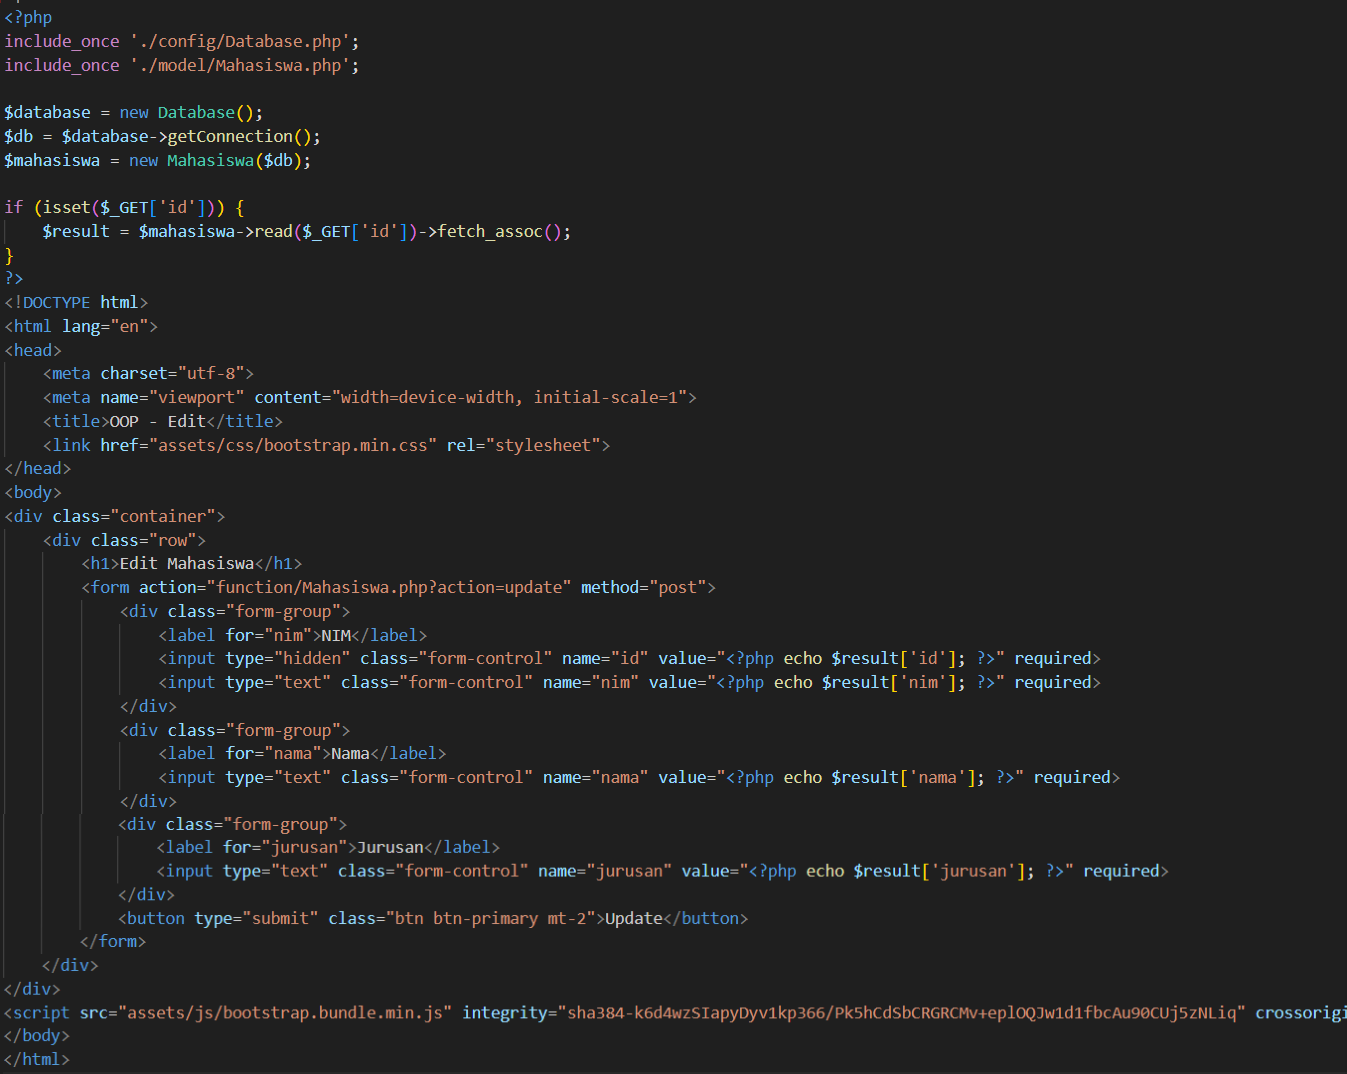
G. View
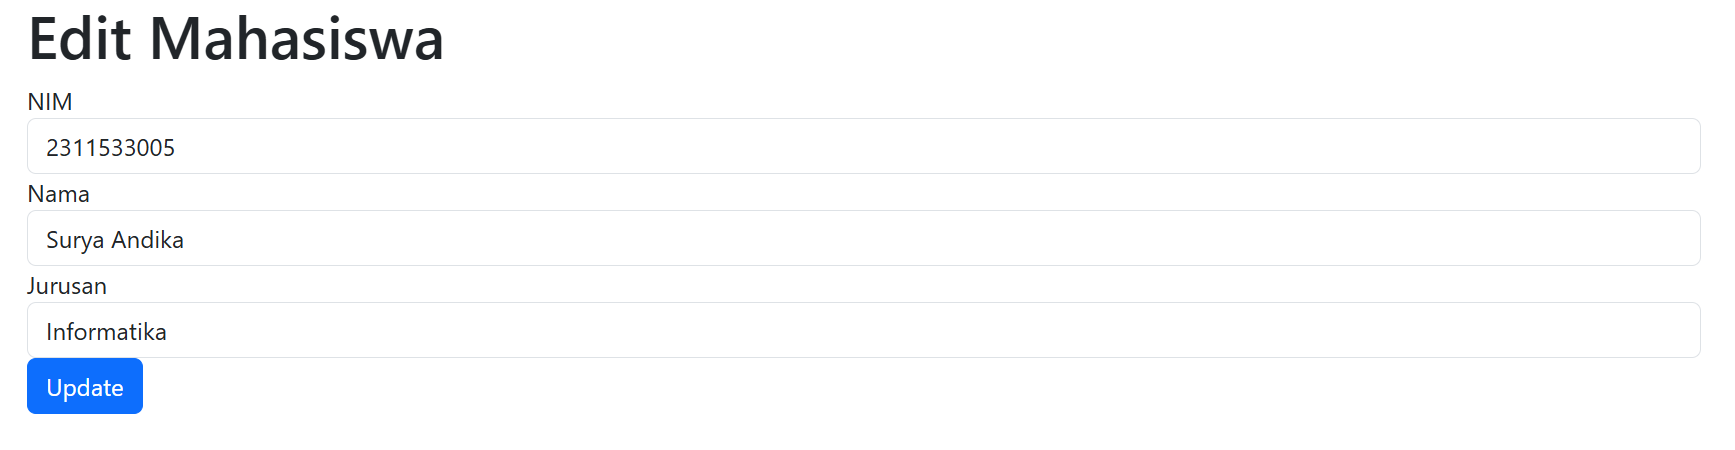
Index.php: file ini akan menampilkan data-data mahasiswa yang sudah berhasil di input.Create.php: file ini adalah tempat untuk menambahkan data mahasiswa.Edit.php: file ini adalah tempat pengguna mengedit data mahasiswa yang sudah di input sebelumnya.